
Need a photo for an email but don’t have one handy? Outlook has a free library of stock photos built in, and you can drop one into a message in about three clicks.
In this tutorial, I’ll show you how to use stock images in Outlook on the web, find a photo that fits, resize it, and check its alt text. I’ll also cover the steps for classic Outlook on Windows. I tested the web steps with a Microsoft 365 work account.
Method 1: Insert a stock image from the Graphics menu
This is where stock images live now in Outlook on the web. Microsoft added a Graphics button to the Insert tab, and it holds emoji, stock images, and stickers in one place.
It sits right next to Pictures, which is for photos on your own computer. If you’re also dressing up your text, you can change the fonts in Outlook Online from the Format text tab.
- Open Outlook on the web and click New mail.
- Click in the message body where you want the photo.
- Select the Insert tab on the ribbon.
- Click the Graphics dropdown and choose Stock images.
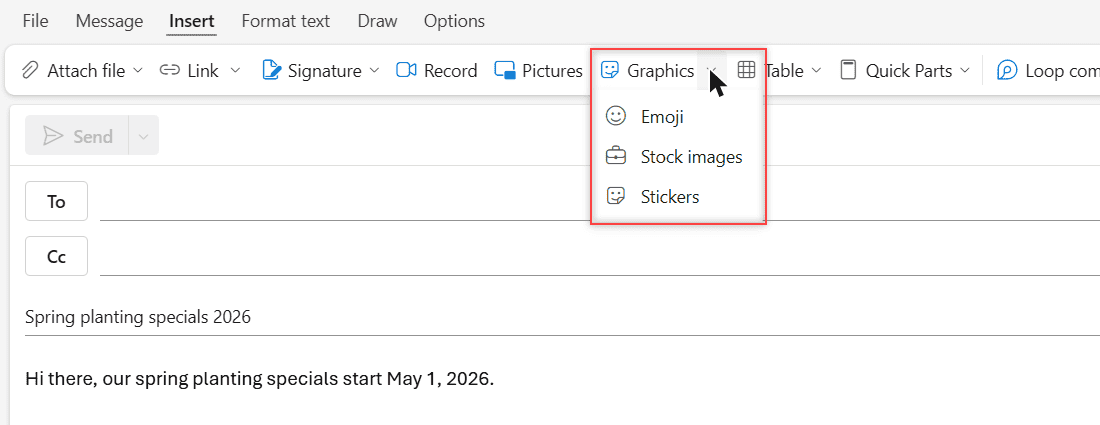
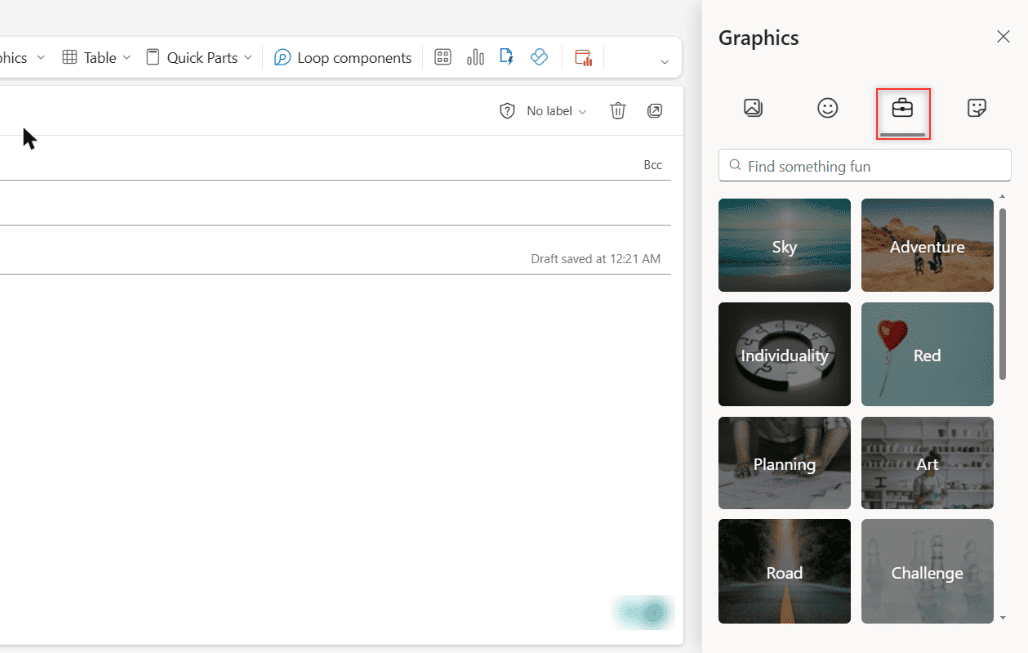
A Graphics pane opens on the right side of the window. It has four tabs across the top: All, Emoji, Stock images, and Stickers. Since you picked Stock images, that tab is already selected.
How does this work?
The pane starts with category tiles like Sky, Adventure, Planning, Art, and Road. Click one to browse, or type in the Find something fun search box. Either way, you stay in your draft, so you can try a few photos without losing what you’ve typed.
Method 2: Search for a photo that fits your message
Browsing the tiles is fun, but searching is faster. I was writing a spring promo for my test business, Bluebird Landscaping, so I searched for “garden.” The same idea works for a newsletter you build from an HTML email template in Outlook Online.
- In the Graphics pane, click the search box.
- Type one plain word, like garden, and press Enter.
- Scroll through the results.
- Click the photo you want. That’s it.
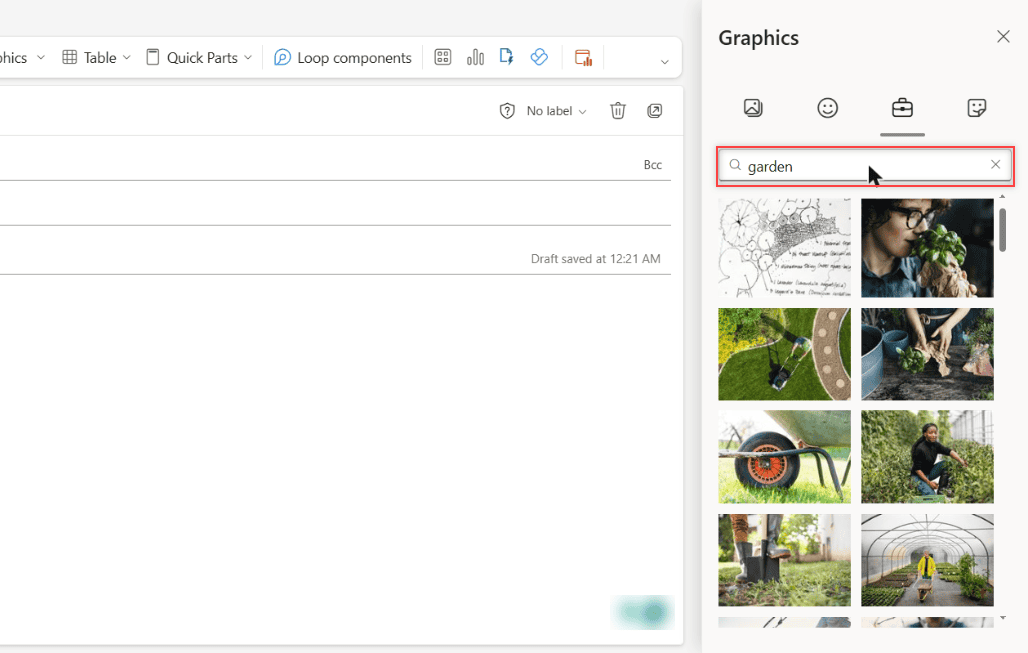
My results had a garden plan sketch, a person holding basil, a lawn mower, hands potting a plant, a wheelbarrow, a gardener, boots, and a greenhouse. I went with the wheelbarrow.
How does this work?
There’s no Insert button on the web. One click drops the photo into the body right where your cursor was. If you change your mind, click the photo, then press Delete, or use Change picture on the Picture format tab.
Pro tip: Search for the thing, not the feeling. “Wheelbarrow” or “basil” gives you sharper results than “growth” or “success.” Short, concrete words work best.
Which Insert button to use for each kind of image
The Insert tab has a few buttons that all put something visual in your email, and it’s easy to grab the wrong one. Here’s how they line up in Outlook on the web, based on what I saw in my mailbox:
| What you want | Where to click | Good for |
|---|---|---|
| A real photo from the library | Insert > Graphics > Stock images | Promos, newsletters, event invites |
| A photo or logo you already have | Insert > Pictures | Your own work, products, team photos |
| A small emoji in the text | Insert > Graphics > Emoji | Friendly notes to coworkers |
| A fun sticker | Insert > Graphics > Stickers | Casual messages, thank-you notes |
The All tab in the Graphics pane mixes all three kinds together. I skip it when I want a photo, because the Stock images tab keeps emoji and stickers out of the results.
For business email, I stick with stock photos or my own pictures. Stickers are cute in a team chat, but a customer reading about spring planting wants to see a yard, not a cartoon.
How to pick a stock photo people will actually look at
A stock photo should help the reader get your point faster. Here’s what I check before I hit send:
- It matches the message. A wheelbarrow says yard work. A generic handshake says nothing.
- It reads small. Most people open email on a phone, so pick a photo with one clear subject.
- One is enough. A single photo near the top looks clean. Three photos start to feel like an ad.
- Text stays as text. Put dates, prices, and links in the message, not inside a picture.
If you send the same kind of email often, save the finished draft and reuse it. You could also make an email confidential in Outlook Online when the photo goes with something internal, like a staff schedule.
Method 3: Resize the stock image in your email
This part surprised me. The photos came in at about 3015 x 2010 pixels and filled the whole width of the message. That’s way too big for a quick note, so I always resize.
- Click the photo in the message body to select it.
- Select the Picture format tab that appears on the ribbon.
- Click Size.
- Pick Best fit, Small (25%), Medium (50%), or Full size (100%).
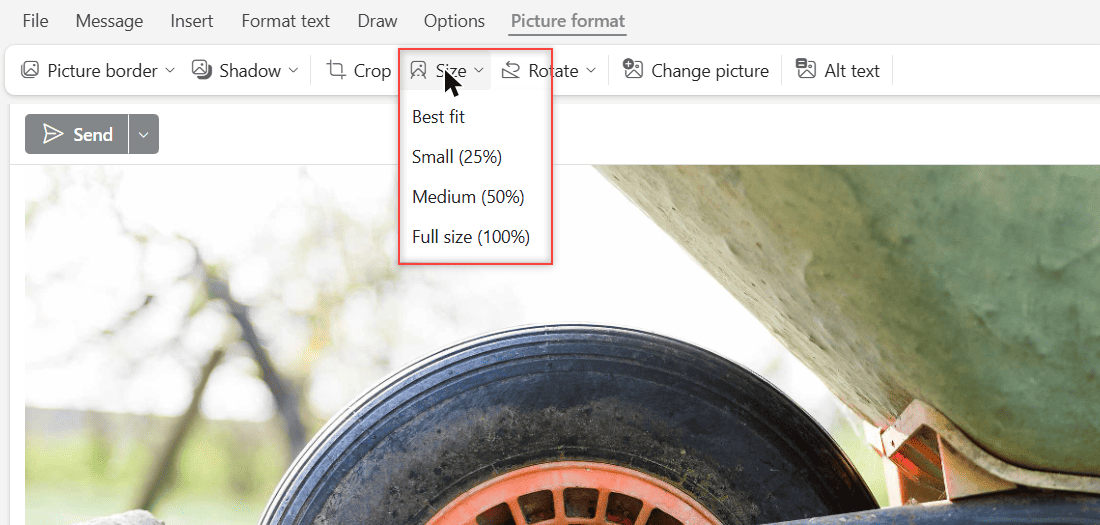
The same tab has Picture border, Shadow, Crop, and Rotate. Crop is handy when the subject is off to one side and you want to cut the empty grass.
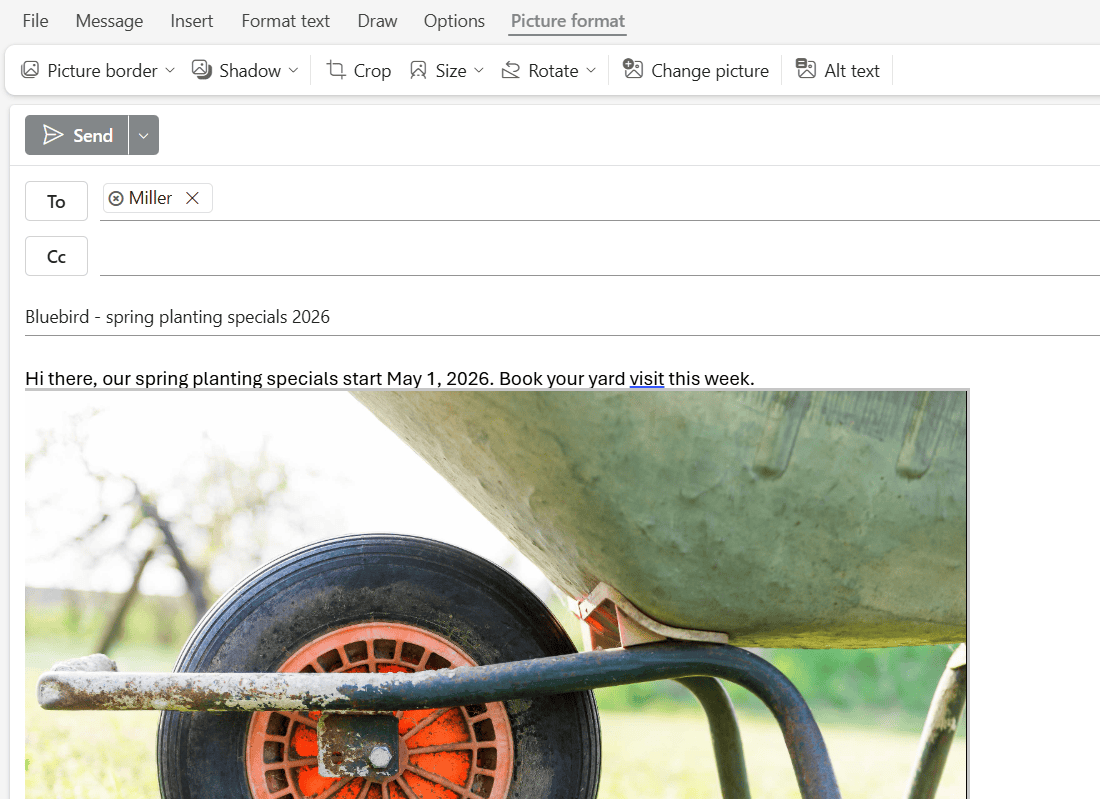
Here’s my finished email to myself, “Bluebird – spring planting specials 2026,” with the wheelbarrow at Small (25%). It showed at 754 x 503 pixels, which fits nicely under two short lines of text.
How does this work?
Size changes how big the photo looks, not the file itself. I sent the email to myself, and the received image was still 3015 x 2013 pixels, just shown at 754 x 503. If you’re worried about a heavy email, read how to reduce image size in Outlook Online.
Method 4: Check the alt text before you send
Alt text is the short description screen readers announce in place of the picture. Some email apps also show it when images don’t load. The good news is that Outlook fills it in for stock photos.
- Click the photo to select it.
- On the Picture format tab, click Alt text.
- Read the description in the Add alt text box and edit it if needed.
- Click OK.
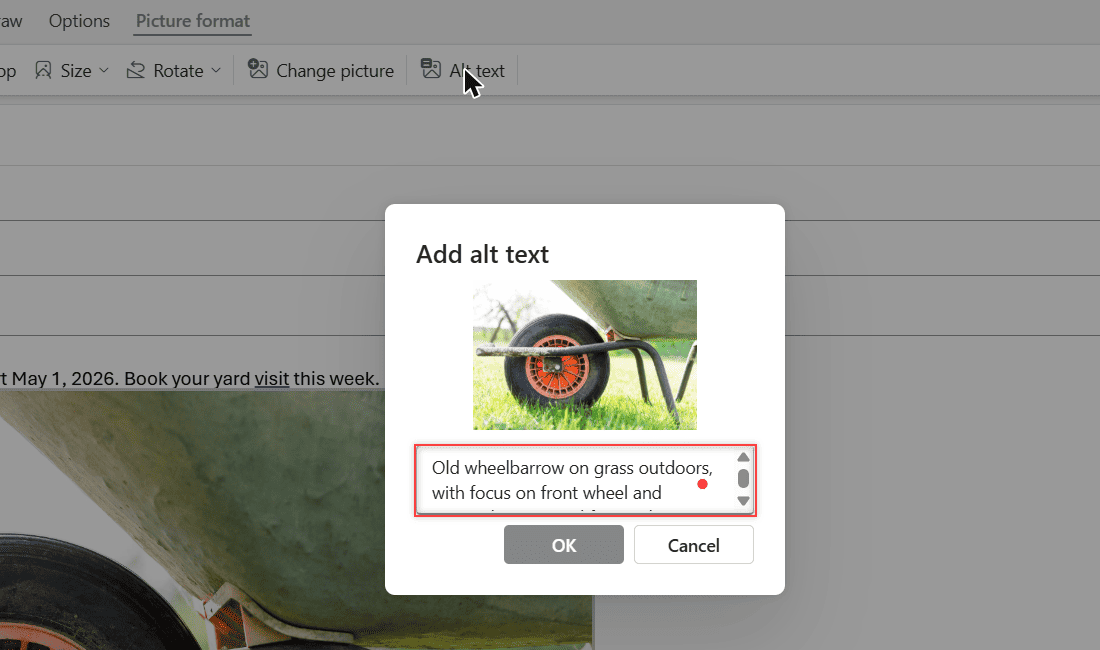
My wheelbarrow already said “Old wheelbarrow on grass outdoors, with focus on front wheel and…” The basil photo I tried got “Person wrapping basil plant” on its own, too.
How does this work?
The built-in description says what’s in the photo, not why it’s there. I sometimes trim it to what matters for the reader, like “Wheelbarrow in a spring yard.” Keep it to one short sentence.
Method 5: Use stock images in classic Outlook for Windows
I didn’t test this one. These are the steps Microsoft lists for the Office desktop apps, including Outlook for Microsoft 365, Outlook 2024, and Outlook 2021:
- Open a new email and click in the message body.
- On the Insert tab, select Pictures, then Stock Images.
- Pick a collection: Images, Icons, Cutout People, Stickers, Illustrations, or Cartoon People.
- Use the search box at the top of the collection to narrow things down.
- Select one or more items, then click Insert.
Unlike the web, the desktop library lets you select several items before you insert them. Microsoft also lists Videos, but only for PowerPoint. To remove a photo you don’t want, click it and press Delete.
Things to keep in mind
- Full library vs a portion. Microsoft says Microsoft 365 subscribers get the full library. Office 2021 and Office for the web users without a subscription get part of it.
- The library grows. Microsoft adds new content every month, so search results can change.
- Pictures is not stock. The Pictures button inserts files from your computer. Stock photos are under Graphics on the web.
- Big files stay big. Resizing doesn’t shrink the attachment. If your mailbox is filling up, check your Outlook storage space.
- What I didn’t test. I used a Microsoft 365 work account on the web. I didn’t try classic Outlook, Outlook for Mac, or a personal Outlook.com account. If Graphics is missing on a work account, ask your IT admin.
Want to do more with your Outlook emails? Try these
- Set automatic replies in Outlook Online
- Create inbox rules in Outlook Online
- Download emails from Outlook
- All Outlook Online tutorials
Frequently Asked Questions
Are Outlook stock images free to use?
Yes. Microsoft describes them as royalty-free images for use in your documents and emails, and its stock images page explains which subscriptions get the full library.
Why don’t I see stock images in Outlook?
On the web, look under Insert, then Graphics, not Pictures. In classic Outlook, it’s Insert, Pictures, Stock Images. Without a Microsoft 365 subscription, you only see part of the library.
Can I add stickers or emoji the same way?
Yes. The Graphics pane on the web has Emoji and Stickers tabs next to Stock images, and one click inserts them the same way.
Does resizing a stock image make the email smaller?
No. In my test, Small (25%) only changed how big the photo looked. The received file was still about 3015 x 2013 pixels.

I am Carissa Gudinoa, a technology buff, and Office online and Apple expert with over 9 years of experience. I am passionate about helping others get the most out of their Apple devices. I have written extensively about Apple products and technologies. I am committed to providing my clients with the best possible service and am always up-to-date on the latest Apple products and features. I also write extensively on other software available for use at minimal cost or free. This includes Word Online, Outlook Online, Excel Online, and other Office online programs… Check out more.